Using tilemaps
Introduction
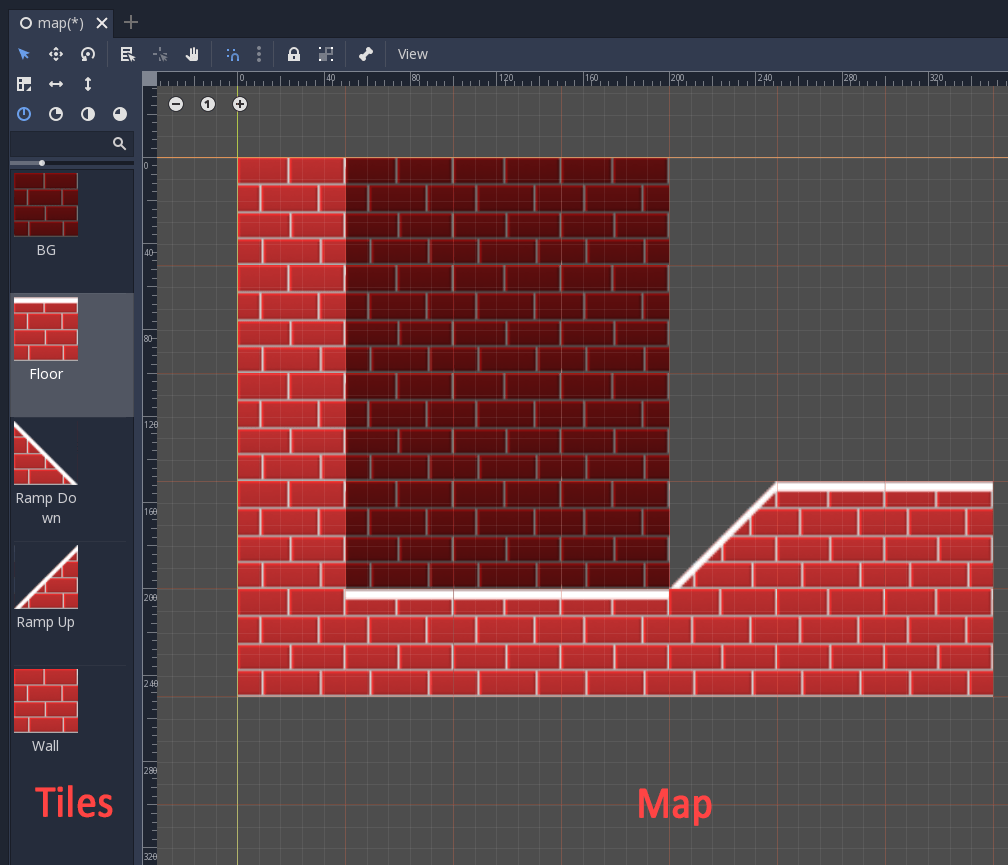
Tilemaps are a simple and quick way to make 2D game levels. Basically, you start with bunch of reference tiles (or pieces) that can be put on a grid, as many times each as desired - think of it like a map editor:
Collisions can also be added to the tiles, allowing for both 2D side scrolling and top down games.
Making a tileset
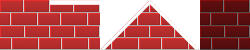
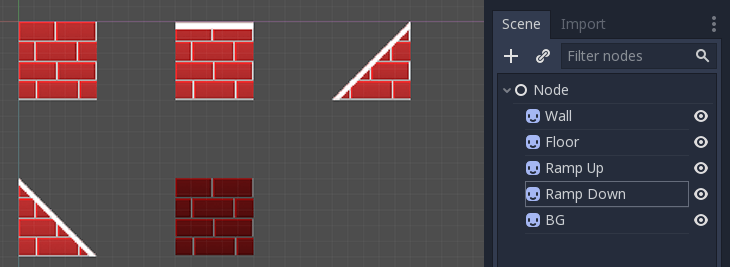
To begin, a tileset needs to be made. Here are some tiles for it. They are all in the same image for optimization reasons. There are so-called texture packers that will generate these spritesheets out of your separate texture files. Having them as separate images also works.
Create a new project and move the above PNG image into the directory. Next
go into the image’s import settings and turn off Filter, keeping it on will cause
issues later. Mipmaps should already be disabled, if not, disable this too.
We will be creating a TileSet resource. While this resource exports properties, it’s pretty difficult to get complex data into it and maintain it. Here is what it would look like to manually edit the resource:
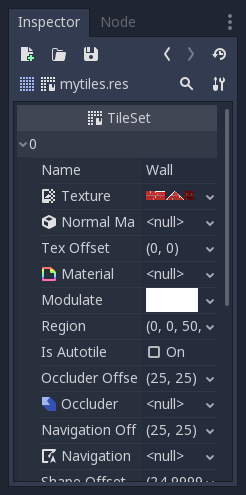
There’s enough properties to get by. With some effort, editing this way can work. But the easiest way to edit and maintain a tileset is exporting it from a specially-crafted scene!
TileSet scene
Create a new scene with a regular Node or Node2D as root. For each tile you want to define,
add a sprite node as a child. Since tiles here are 50x50, you should turn on the grid
(View -> Show Grid or G key) and enable snap (Use Snap icon or S key).
Moving tiles with the mouse might still be a inaccurate
so use your arrow keys as well.
If more than one tile is present in the source image, make sure to use the region property of the sprite to adjust which part of the texture is being used.
Finally, make sure to name your sprite node correctly. This will ensure that, in subsequent edits to the tileset (for example, if added collision, changed the region, etc), the tile will still be identified correctly and updated. This name should be unique.
Sounds like a lot of requirements, so here’s a screenshot that shows where everything of relevance is:
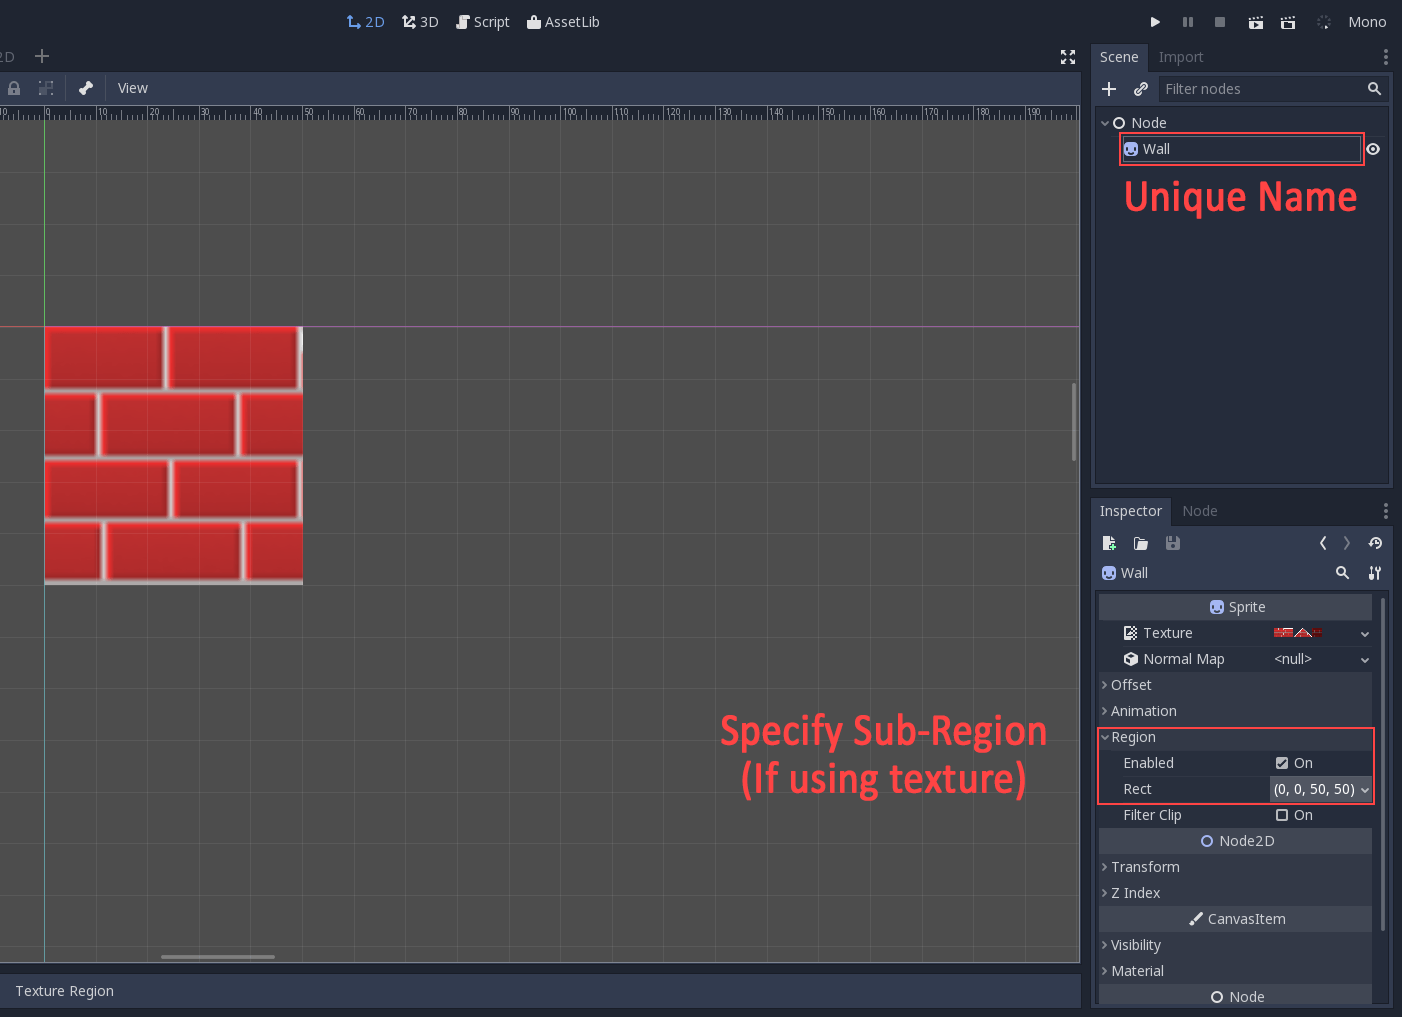
Continue adding all the tiles, adjusting the offsets if needed (that is, if you have multiple tiles in a single source image). Again, remember that their names must be unique.
Collision
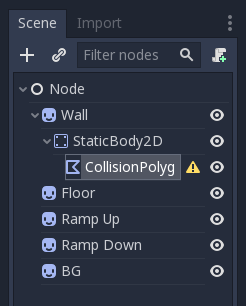
To add collision to a tile, create a StaticBody2D child for each sprite. This is a static collision node. Then create a CollisionShape2D or CollisionPolygon as a child of the StaticBody2D. The CollisionPolygon is recommended because it is easier to edit.
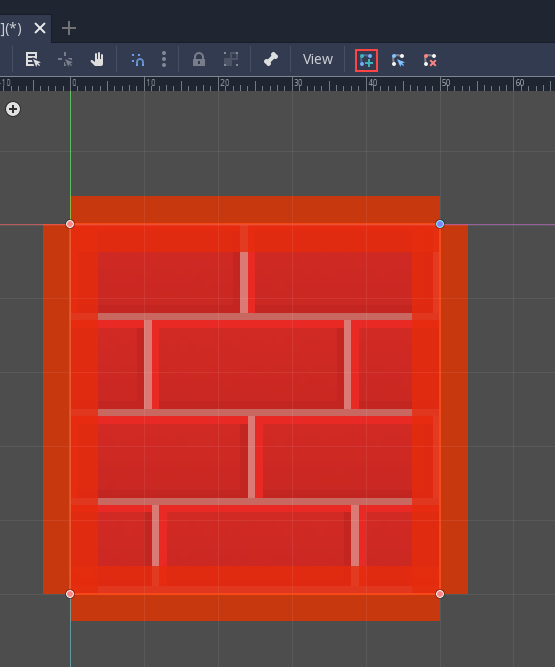
Finally, edit the polygon, this will give the tile a collision and fix the warning icon next to the CollisionPolygon node. Remember to use snap! Using snap will make sure collision polygons are aligned properly, allowing a character to walk seamlessly from tile to tile. Also do not scale or move the collision and/or collision polygon nodes. Leave them at offset 0,0, with scale 1,1 and rotation 0 with respect to the parent sprite.
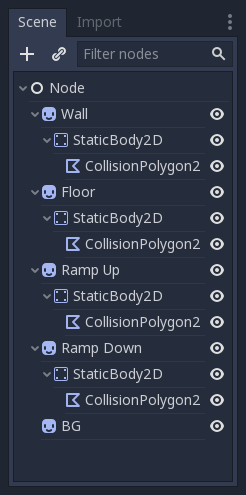
Keep adding collisions to the tiles until we are done. Note that BG is just a background, so it should not have a collision.
OK! We’re done! Remember to save this scene for future edit. Name it “tileset_edit.scn” or something like that.
Exporting a TileSet
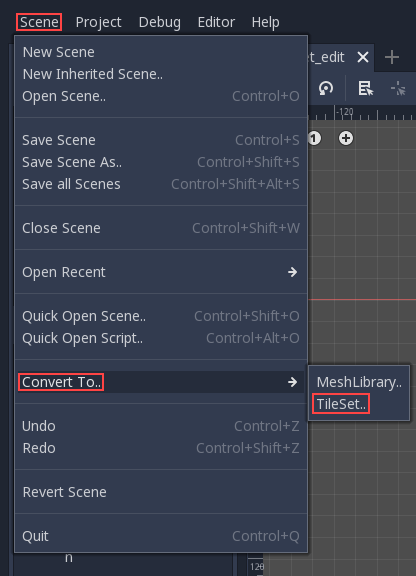
With the scene created and opened in the editor, the next step will be to create a tileset. Use Scene > Convert To > Tile Set from the Scene Menu:
Then choose a filename, like “mytiles.tres”. Make sure the “Merge With Existing” option is toggled on. This way, every time the tileset resource file is overwritten, existing tiles are merged and updated (they are referenced by their unique name, so again, name your tiles properly).

Using the TileSet in a TileMap
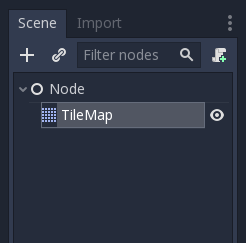
Create a new scene, using any node or node2d as root, and then create a TileMap as a child.
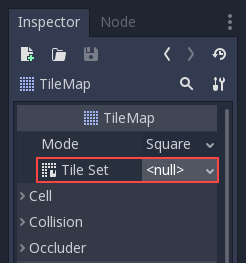
Go to the TileSet property of this node and assign the one created in previous steps:
Also set the cell size to ‘50’, since that is the size used by the tiles. Quadrant size is a tuning value, which means that the engine will draw and cull the tilemap in blocks of 16x16 tiles. This value is usually fine and does not need to be changed, but can be used to fine tune performance in specific cases (if you know what you are doing).
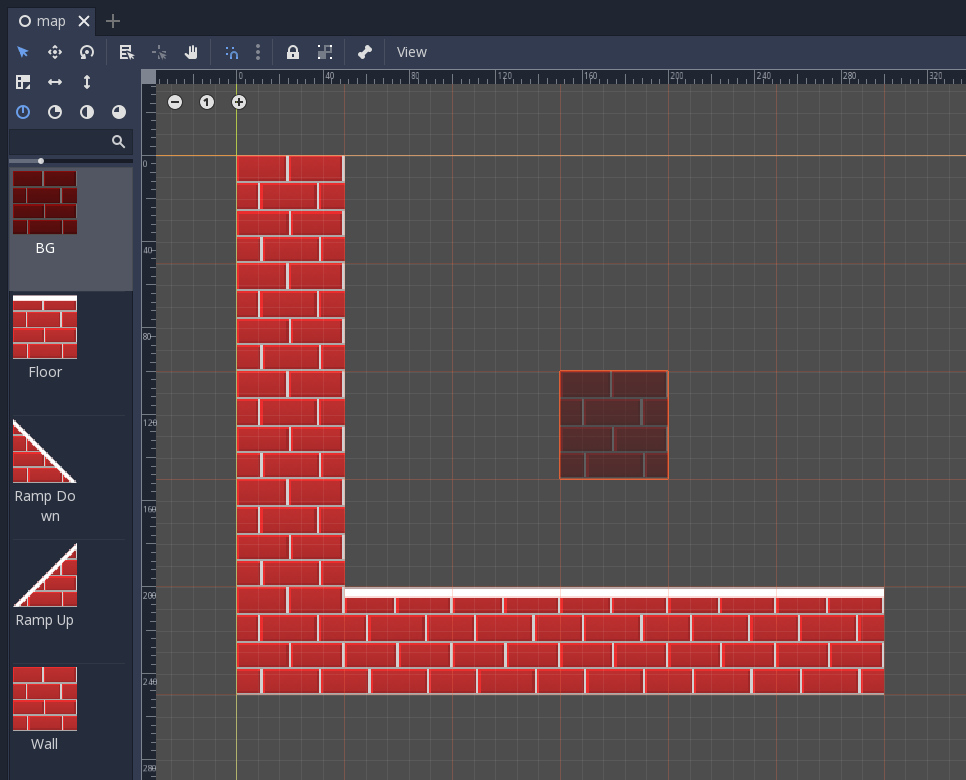
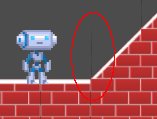
Painting your world
With all set, make sure the TileMap node is selected. A red grid will appear on screen, allowing to paint on it with the selected tile on the left palette.
To avoid accidentally moving and selecting the tilemap node (something common, given it’s a huge node), it is recommended that you lock it, using the lock button:

If you accidentally place a tile somewhere you don’t want it to be, you
can delete it with RMB while in the tilemap editor.
You can also flip and rotate sprites in the TileMap editor (note: flipping the sprite in the TileSet will have no effect). Icons at the top right of the editor allow flipping and rotating of the currently selected sprite - you can also use the A and S keys to flip the sprite horizontally and vertically. With a brick pattern like this tutorial uses, flipping the sprites would create unpleasant discontinuities unless you’re flipping an entire region of bricks. But for some kinds of tiles, flipping can be a convenient and space-saving feature.
Offset and scaling artifacts
When using a single texture for all the tiles, scaling the tileset (or even moving to a non pixel-aligned location) will most likely result in filtering artifacts like so:
This is unavoidable, as it is the way the hardware bilinear filter works. So, to avoid this situation, there are a few workarounds. Try the one that looks better for you:
- Disable filtering and mipmaps for either the tileset texture or all tile textures if using separate images (see the Importing Images asset pipeline tutorial).
- Enable pixel snap (Set
Project > Project Settings >
Rendering > Quality > 2d > Use Pixel Snap
to true, you can also search forPixel Snap). - Viewport Scaling can often help with shrinking the map (see the
Viewports tutorial). Simply adding a camera, setting it to
Currentand playing around with it’sZoommay be a good starting point. - You can use a single, separate image for each tile. This will remove all artifacts but can be more cumbersome to implement and is less optimized.