Work in progress
The content of this page was not yet updated for Godot
4.2
and may be outdated. If you know how to improve this page or you can confirm
that it's up to date, feel free to open a pull request.
Сцена гравця та дій введення
В наступних двох уроках ми спроектуємо сцену гравця, зареєструємо спеціальні дії введення та закодуємо рух гравця. Зрештою, у вас вийде ігровий персонаж, який рухається у восьми напрямках.
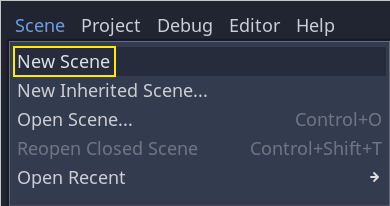
Create a new scene by going to the Scene menu in the top-left and clicking New Scene.
Create a CharacterBody3D node as the root
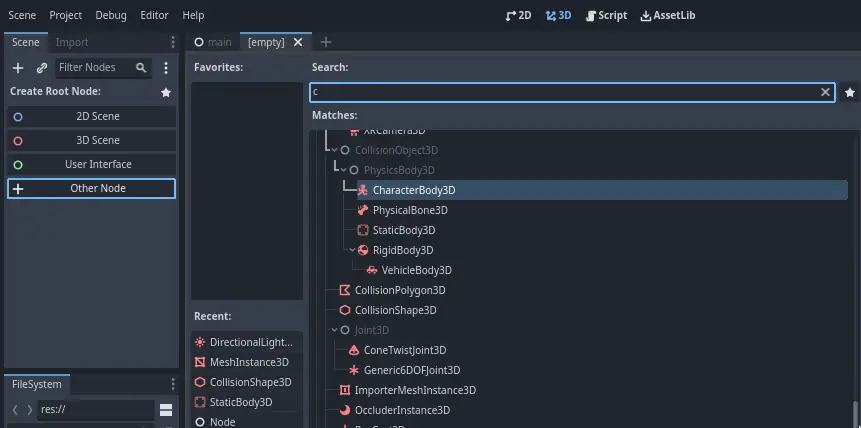
Name the CharacterBody3D to Player.
Character bodies are complementary to the area and rigid bodies used in the 2D
game tutorial. Like rigid bodies, they can move and collide with the
environment, but instead of being controlled by the physics engine, you dictate
their movement. You will see how we use the node's unique features when we code
the jump and squash mechanics.
Дивись також
Щоб дізнатися більше про різні типи фізичних вузлів, перегляньте Physics introduction.
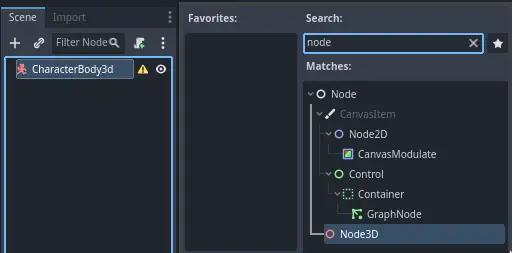
На даний момент ми збираємося створити базовий конструкт (риг) для 3D-моделі нашого персонажа. Він дозволить нам обертати модель пізніше за допомогою коду, поки вона відтворює анімацію.
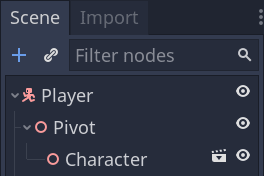
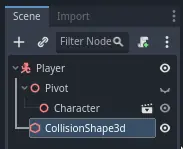
Додайте вузол Node3D як дочірній до Player і назвіть його Pivot
Then, in the FileSystem dock, expand the art/ folder
by double-clicking it and drag and
drop player.glb onto Pivot.
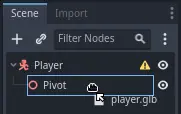
This should instantiate the model as a child of Pivot.
You can rename it to Character.
Примітка
The .glb files contain 3D scene data based on the open source GLTF 2.0
specification. They're a modern and powerful alternative to a proprietary format
like FBX, which Godot also supports. To produce these files, we designed the
model in Blender 3D and exported it to GLTF.
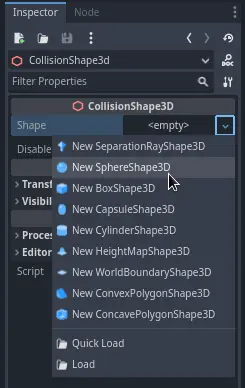
As with all kinds of physics nodes, we need a collision shape for our character
to collide with the environment. Select the Player node again and add a child node
CollisionShape3D. In the Inspector, on the Shape property, add a new SphereShape3D.
The sphere's wireframe appears below the character.
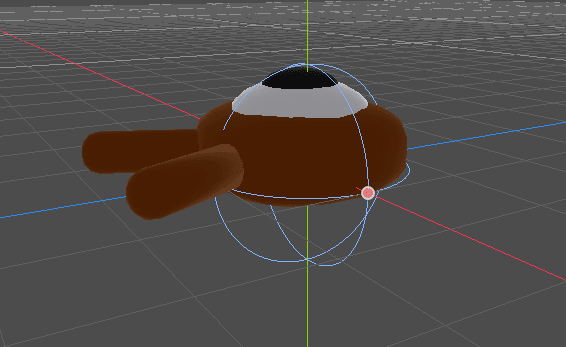
Це буде форма, яку фізичний рушій використовує для зіткнення з навколишнім середовищем, тому ми хочемо, щоб він краще підходив до 3D-моделі. Варто трохи зменшити його, перетягнувши помаранчеву крапку у вікні перегляду. Моя сфера має радіус близько 0.8 метрів.
Потім перемістіть фігуру вгору, щоб її дно приблизно вирівнялося з площиною сітки.
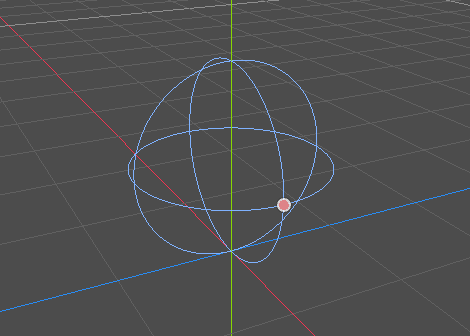
You can toggle the model's visibility by clicking the eye icon next to the
Character or the Pivot nodes.
Збережіть сцену як player.tscn
Підготувавши вузли ми можемо переходити до кодування. Але спочатку необхідно визначити деякі дії введення.
Створення дій введення
Щоб перемістити персонажа, ми прислухаємося до введення гравця, наприклад, натискання клавіш зі стрілками. У Godot, хоча ми могли б прописати всі прив'язки клавіш в коді, є потужна система, яка дозволяє призначити мітку комбінаціям клавіш і кнопок. Це спрощує наші скрипти і робить їх більш читабельними.
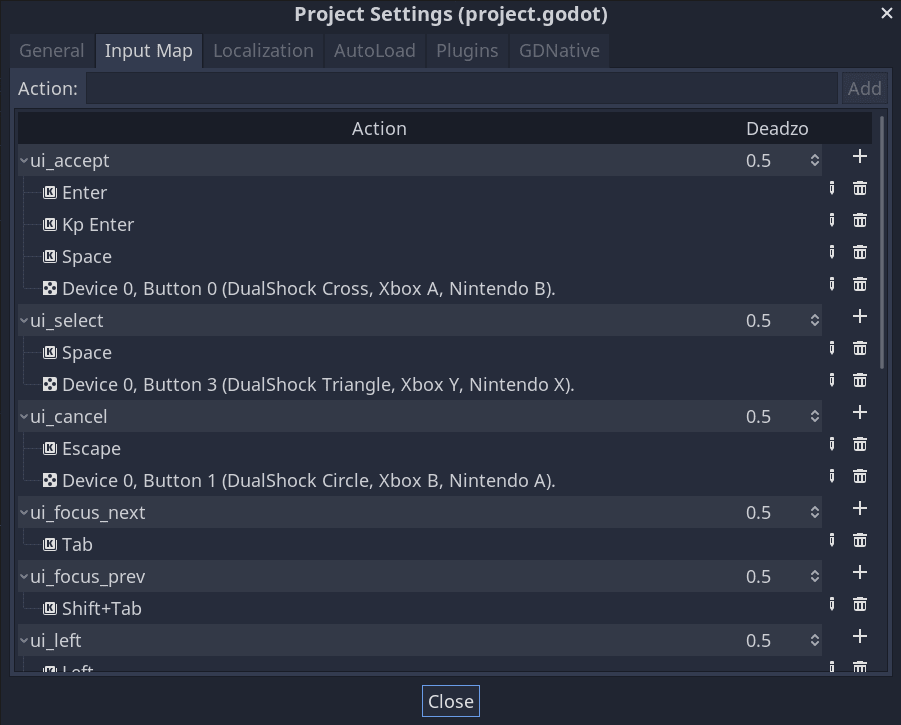
This system is the Input Map. To access its editor, head to the Project menu and select Project Settings.
Зображення
У верхній частині є кілька вкладок. Натисніть на Карту введення. За допомогою цього вікна ви можете додавати нові дії вгорі; це ваші мітки. У нижній частині ви можете прив'язати клавіші до цих дій.
Проекти Godot поставляються з деякими заздалегідь визначеними діями, призначеними для дизайну інтерфейсу користувача, які ми могли б використовувати тут. Але ми визначаємо свої власні для підтримки геймпаду.
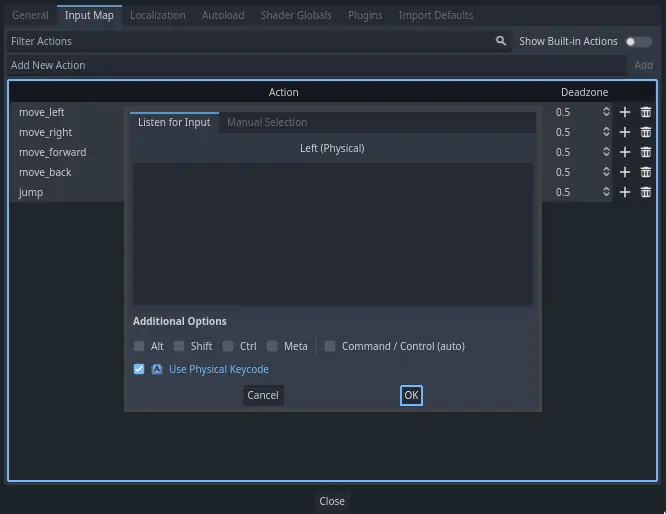
Ми назвемо наші дії move_left, move_right, move_forward, move_back, та jump.
Щоб додати дію, напишіть її ім'я в полі вгорі та натисніть Enter.

Create the following five actions:

To bind a key or button to an action, click the "+" button to its right. Do this
for move_left. Press the left arrow key and click OK.
Bind also the A key, onto the action move_left.

Let's now add support for a gamepad's left joystick. Click the "+" button again but this time, select Manual Selection -> Joypad Axes.
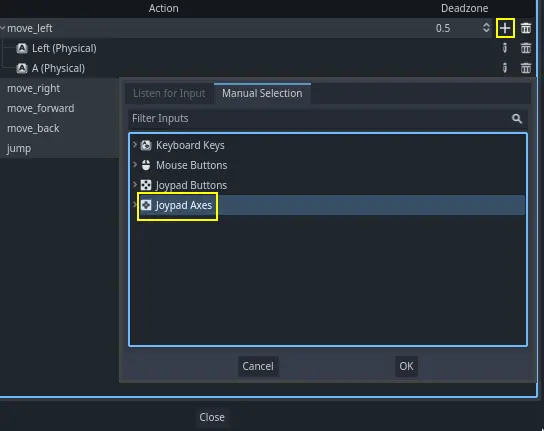
Select the negative X axis of the left joystick.
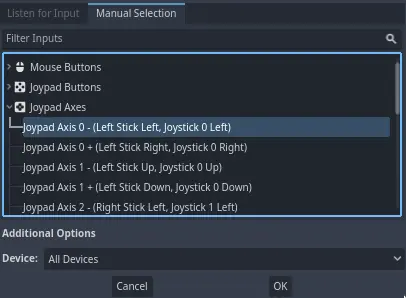
Leave the other values as default and press OK
Примітка
If you want controllers to have different input actions, you should use the Devices option in Additional Options. Device 0 corresponds to the first plugged gamepad, Device 1 corresponds to the second plugged gamepad, and so on.
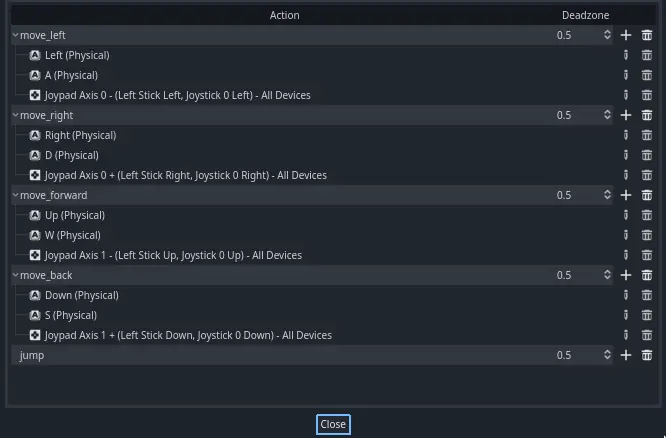
Do the same for the other input actions. For example, bind the right arrow, D,
and the left joystick's positive axis to move_right. After binding all keys,
your interface should look like this.
The final action to set up is the jump action. Bind the Space key and the gamepad's
A button.
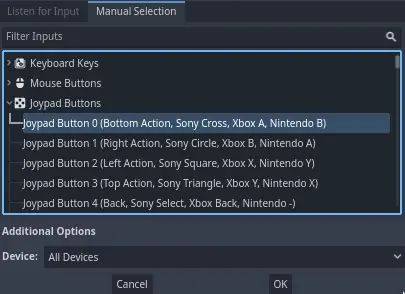
Дія введення для стрибка має виглядати так.

Це всі дії, які нам потрібні для цієї гри. За допомогою цього меню можна позначити будь-які групи клавіш і кнопок у ваших проектах.
У наступній частині ми закодуємо і перевіримо рух гравця.