Up to date
This page is up to date for Godot 4.2.
If you still find outdated information, please open an issue.
Використання сигналів
На цьому уроці ми розглянемо сигнали. Це повідомлення, які видають вузли, коли з ними відбувається щось конкретне, наприклад, натискання кнопки. Інші вузли можуть підключатися до цього сигналу і викликати функцію, коли відбувається подія.
Сигнали є механізмом делегування, вбудований у Godot, що дозволяє одному ігровому об’єкту реагувати на зміни іншого, не посилаючись один на одного. Використання сигналів зменшує зв'язність і забезпечує гнучкість вашого коду.
For example, you might have a life bar on the screen that represents the player's health. When the player takes damage or uses a healing potion, you want the bar to reflect the change. To do so, in Godot, you would use signals.
Примітка
Як згадувалося у вступі, сигнали є версією Godot шаблону спостерігача. Детальніше про шаблон спостерігач можна прочитати тут: https://gameprogrammingpatterns.com/observer.html
Тепер ми будемо використовувати сигнал, для керування рухом іконки Godot з попереднього уроку (Обробка вводу гравця).
Налаштування сцени
To add a button to our game, we will create a new main scene which will include
both a Button and the sprite_2d.tscn scene we created in
the Створення першого сценарію lesson.
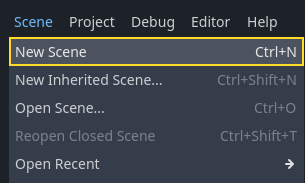
Створіть нову сцену перейшовши до меню Сцена -> Нова Сцена.
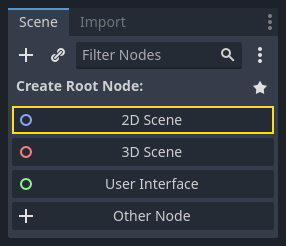
In the Scene dock, click the 2D Scene button. This will add a Node2D as our root.
In the FileSystem dock, click and drag the sprite_2d.tscn file you saved
previously onto the Node2D to instantiate it.

We want to add another node as a sibling of the Sprite2D. To do so, right-click on Node2D and select Add Child Node.
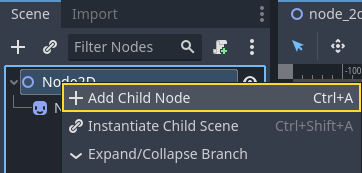
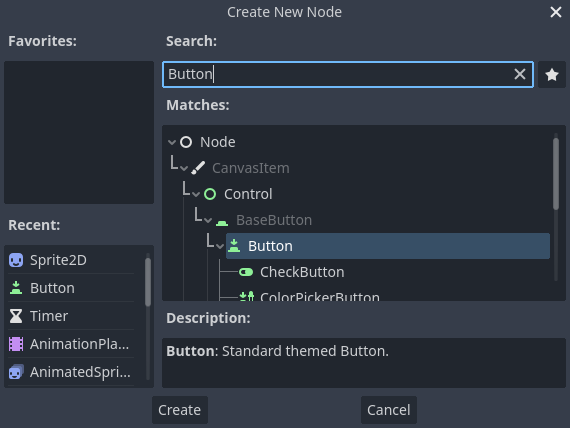
Search for the Button node and add it.
Вузол за замовчуванням невеликий. Натисніть і перетягніть нижній правий маркер Кнопки у вікні перегляду, щоб змінити її розмір.
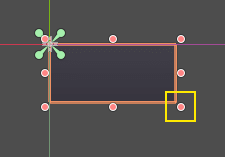
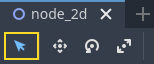
Якщо ви не бачите маркерів, переконайтеся, що інструмент вибору активний на панелі інструментів.
Натисніть і перетягніть саму кнопку, щоб наблизити її до спрайту.
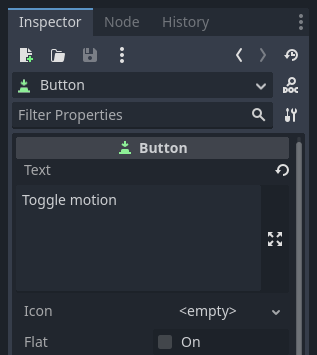
You can also write a label on the Button by editing its Text property in the
Inspector. Enter Toggle motion.
Ваше дерево сцени та область перегляду мають виглядати так.
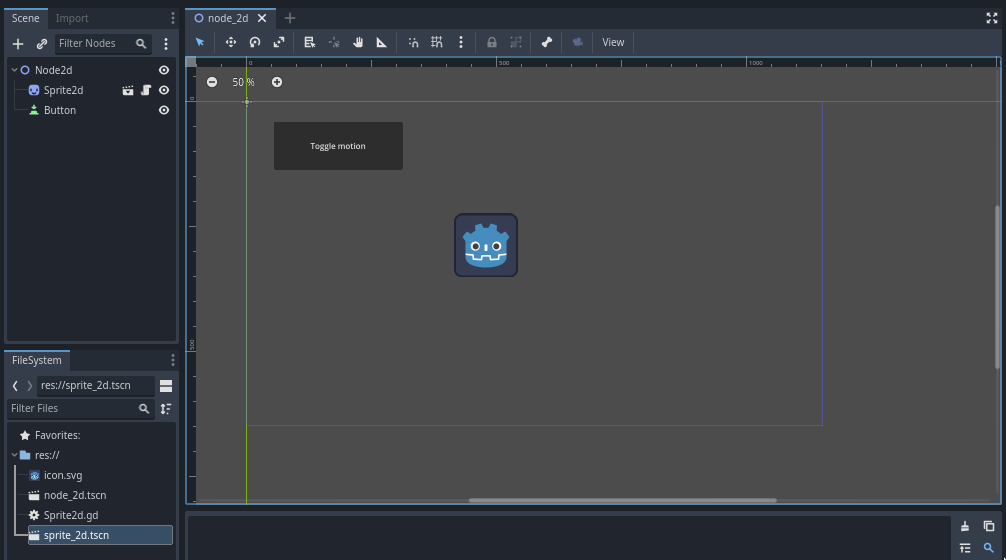
Save your newly created scene as node_2d.tscn, if you haven't already.
You can then run it with F6 (Cmd + R on macOS).
At the moment, the button will be visible, but nothing will happen if you
press it.
Підключення сигналів в редакторі
Here, we want to connect the Button's "pressed" signal to our Sprite2D, and we want to call a new function that will toggle its motion on and off. We need to have a script attached to the Sprite2D node, which we do from the previous lesson.
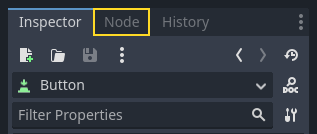
Ви можете підключати сигнали на панелі Вузол. Виберіть вузол Кнопка і в правій частині редактора натисніть вкладку "Вузол" поруч із Інспектором.
Панель відображає список сигналів, доступних на вибраному вузлі.
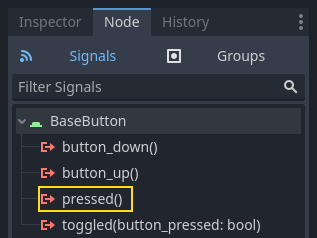
Двічі клацніть сигнал "pressed", щоб відкрити вікно підключення вузла.
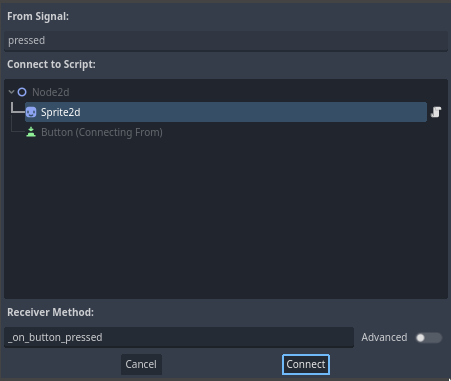
There, you can connect the signal to the Sprite2D node. The node needs a receiver method, a function that Godot will call when the Button emits the signal. The editor generates one for you. By convention, we name these callback methods "_on_node_name_signal_name". Here, it'll be "_on_button_pressed".
Примітка
При підключенні сигналів через панель редактора Вузол можна використовувати два режими. Простий дозволяє підключатися лише до вузлів, до яких приєднано скрипт, і створює в них нову функцію зворотного виклику.

Розширений перегляд дозволяє підключатися до будь-якого вузла та будь-якої вбудованої функції, додавати аргументи до зворотного виклику та встановлювати параметри. Ви можете змінити режим у правому нижньому кутку вікна, натиснувши кнопку "Додатково".
Натисніть кнопку З'єднати, щоб завершити підключення сигналу та перейти до робочої області Script. Ви повинні побачити новий метод зі значком підключення на лівому полі.
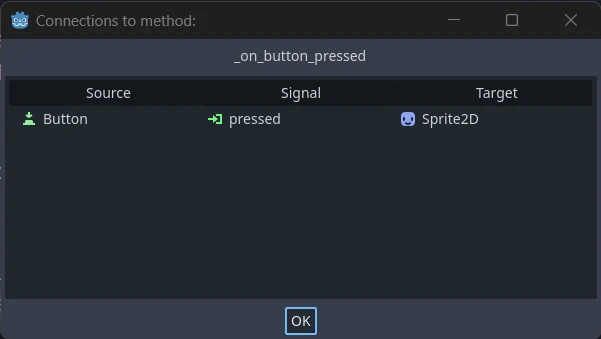
Якщо натиснути іконку, з’явиться вікно з інформацією про з’єднання. Ця функція доступна лише при підключенні вузлів у редакторі.
Давайте замінимо рядок із ключовим словом pass на код, який перемикає рух вузла.
Our Sprite2D moves thanks to code in the _process() function. Godot provides
a method to toggle processing on and off: Node.set_process(). Another method of the Node class,
is_processing(), returns true if idle processing is active. We can use
the not keyword to invert the value.
func _on_button_pressed():
    set_process(not is_processing())
private void OnButtonPressed()
{
    SetProcess(!IsProcessing());
}
Ця функція перемикає обробку і, в свою чергу, рух значка вмикається і вимикається при натисканні кнопки.
Перш ніж спробувати гру нам потрібно спростити нашу функцію _process() до самостійного переміщення вузла без очікування на введення гравця. Замініть її наступним кодом, який ми бачили два уроки тому:
func _process(delta):
    rotation += angular_speed * delta
    var velocity = Vector2.UP.rotated(rotation) * speed
    position += velocity * delta
public override void _Process(double delta)
{
    Rotation += _angularSpeed * (float)delta;
    var velocity = Vector2.Up.Rotated(Rotation) * _speed;
    Position += velocity * (float)delta;
}
Your complete sprite_2d.gd code should look like the following.
extends Sprite2D

var speed = 400
var angular_speed = PI


func _process(delta):
    rotation += angular_speed * delta
    var velocity = Vector2.UP.rotated(rotation) * speed
    position += velocity * delta


func _on_button_pressed():
    set_process(not is_processing())
using Godot;

public partial class MySprite2D : Sprite2D
{
    private float _speed = 400;
    private float _angularSpeed = Mathf.Pi;

    public override void _Process(double delta)
    {
        Rotation += _angularSpeed * (float)delta;
        var velocity = Vector2.Up.Rotated(Rotation) * _speed;
        Position += velocity * (float)delta;
    }

    private void OnButtonPressed()
    {
        SetProcess(!IsProcessing());
    }
}
Запустіть сцену і натисніть кнопку, щоб побачити як спрайт стартує та зупиняється.
Підключення сигналів за допомогою коду
Ви можете підключати сигнали за допомогою коду замість того, щоб використовувати редактор. Це необхідно, коли ви створюєте вузли або вставляєте сцени всередину скрипту.
Давайте використаємо тут інший вузол. Godot має вузол таймера Timer, який корисний для реалізації часу зарядки навичок, перезавантаження зброї тощо.
Head back to the 2D workspace. You can either click the "2D" text at the top of the window or press Ctrl + F1 (Ctrl + Cmd + 1 on macOS).
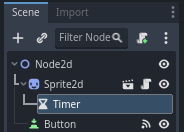
In the Scene dock, right-click on the Sprite2D node and add a new child node. Search for Timer and add the corresponding node. Your scene should now look like this.
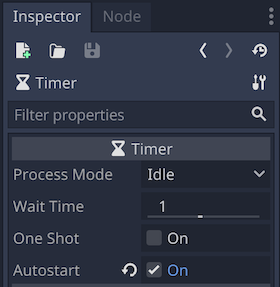
With the Timer node selected, go to the Inspector and enable the Autostart property.
Click the script icon next to Sprite2D to jump back to the scripting workspace.

Нам потрібно зробити дві операції для з'єднання вузлів за допомогою коду:
Get a reference to the Timer from the Sprite2D.
Call the
connect()method on the Timer's "timeout" signal.
Примітка
To connect to a signal via code, you need to call the connect()
method of the signal you want to listen to. In this case, we want to
listen to the Timer's "timeout" signal.
We want to connect the signal when the scene is instantiated, and we can do that using the Node._ready() built-in function, which is called automatically by the engine when a node is fully instantiated.
Щоб отримати посилання на вузол відносно поточного, використовуємо метод Node.get_node(). Ми можемо зберігати посилання в змінній.
func _ready():
    var timer = get_node("Timer")
public override void _Ready()
{
    var timer = GetNode<Timer>("Timer");
}
The function get_node() looks at the Sprite2D's children and gets nodes by
their name. For example, if you renamed the Timer node to "BlinkingTimer" in the
editor, you would have to change the call to get_node("BlinkingTimer").
We can now connect the Timer to the Sprite2D in the _ready() function.
func _ready():
    var timer = get_node("Timer")
    timer.timeout.connect(_on_timer_timeout)
public override void _Ready()
{
    var timer = GetNode<Timer>("Timer");
    timer.Timeout += OnTimerTimeout;
}
The line reads like so: we connect the Timer's "timeout" signal to the node to
which the script is attached. When the Timer emits timeout, we want to call
the function _on_timer_timeout(), that we need to define. Let's add it at the
bottom of our script and use it to toggle our sprite's visibility.
Примітка
By convention, we name these callback methods in GDScript as "_on_node_name_signal_name" and in C# as "OnNodeNameSignalName". Here, it'll be "_on_timer_timeout" for GDScript and OnTimerTimeout() for C#.
func _on_timer_timeout():
    visible = not visible
private void OnTimerTimeout()
{
    Visible = !Visible;
}
Властивість visible контролює видимість нашого вузла. Рядок visible = not visible перемикає значення. Якщо visible є true, то стає false, і навпаки.
Якщо ви запустите сцену зараз, ви побачите, що спрайт блимає та вимикається з інтервалом в одну секунду.
Завершений скрипт
That's it for our little moving and blinking Godot icon demo!
Here is the complete sprite_2d.gd file for reference.
extends Sprite2D

var speed = 400
var angular_speed = PI


func _ready():
    var timer = get_node("Timer")
    timer.timeout.connect(_on_timer_timeout)


func _process(delta):
    rotation += angular_speed * delta
    var velocity = Vector2.UP.rotated(rotation) * speed
    position += velocity * delta


func _on_button_pressed():
    set_process(not is_processing())


func _on_timer_timeout():
    visible = not visible
using Godot;

public partial class MySprite2D : Sprite2D
{
    private float _speed = 400;
    private float _angularSpeed = Mathf.Pi;

    public override void _Ready()
    {
        var timer = GetNode<Timer>("Timer");
        timer.Timeout += OnTimerTimeout;
    }

    public override void _Process(double delta)
    {
        Rotation += _angularSpeed * (float)delta;
        var velocity = Vector2.Up.Rotated(Rotation) * _speed;
        Position += velocity * (float)delta;
    }

    private void OnButtonPressed()
    {
        SetProcess(!IsProcessing());
    }

    private void OnTimerTimeout()
    {
        Visible = !Visible;
    }
}
Власні сигнали
Примітка
Цей розділ пояснює, як визначити і використовувати власні сигнали, і не має відношення до проекту, створеного на попередніх уроках.
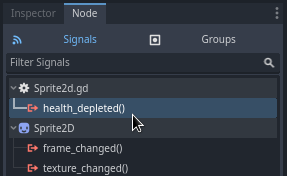
Ви можете визначити власні сигнали в скрипті. Скажімо, ви хочете показати екран завершення гри, коли здоров'я гравця досягає нуля. Для цього ви можете визначити сигнал під назвою "died" ("помер") або "health_depleted" ("здоров'я_вичерпане"), коли їх здоров'я досягає 0.
extends Node2D

signal health_depleted

var health = 10
using Godot;

public partial class MyNode2D : Node2D
{
    [Signal]
    public delegate void HealthDepletedEventHandler();

    private int _health = 10;
}
Примітка
Оскільки сигнали представляють події, які щойно відбулися, ми зазвичай використовуємо дієслово дії в минулому часі в їх назвах.
Ваші сигнали працюють так само, як і вбудовані: вони з'являються на панелі Вузол, і ви можете підключитися до них, як і до будь-яких інших.
To emit a signal in your scripts, call emit() on the signal.
func take_damage(amount):
    health -= amount
    if health <= 0:
        health_depleted.emit()
public void TakeDamage(int amount)
{
    _health -= amount;

    if (_health <= 0)
    {
        EmitSignal(SignalName.HealthDepleted);
    }
}
Сигнал може при потребі оголошувати один, або кілька, аргументів. Вкажіть назви аргументів між дужками:
extends Node

signal health_changed(old_value, new_value)

var health = 10
using Godot;

public partial class MyNode : Node
{
    [Signal]
    public delegate void HealthChangedEventHandler(int oldValue, int newValue);

    private int _health = 10;
}
Примітка
Аргументи сигналу відображаються у панелі вузла редактора, і Godot може використовувати їх для створення функцій зворотного виклику для вас. Однак ви все одно можете випромінювати будь-яку кількість аргументів, разом із сигналами. Ви повинні випромінювати правильні значення.
To emit values along with the signal, add them as extra arguments to the
emit() function:
func take_damage(amount):
    var old_health = health
    health -= amount
    health_changed.emit(old_health, health)
public void TakeDamage(int amount)
{
    int oldHealth = _health;
    _health -= amount;
    EmitSignal(SignalName.HealthChanged, oldHealth, _health);
}
Підсумок
Будь-який вузол в Godot випромінює сигнали, коли з ним відбувається щось конкретне, наприклад, натискається кнопка. Інші вузли можуть підключатися до окремих сигналів і реагувати на вибрані події.
Сигнали мають багато застосувань. З ними ви можете реагувати на вузол, що входить, чи виходить, з ігрового світу, на зіткнення, на персонажа, що входить, чи залишає область, на елемент інтерфейсу, що змінює розмір, і багато іншого.
Наприклад, Area2D, у вигляді монети, випромінює сигнал body_entered кожного разу, коли стикається з фізичним тілом гравця, що дозволяє вам знати, що гравець її зібрав.
У наступному розділі, Ваша перша 2D гра, ви створите повну 2D гру і використаєте все, чого дізналися до цих пір, на практиці.